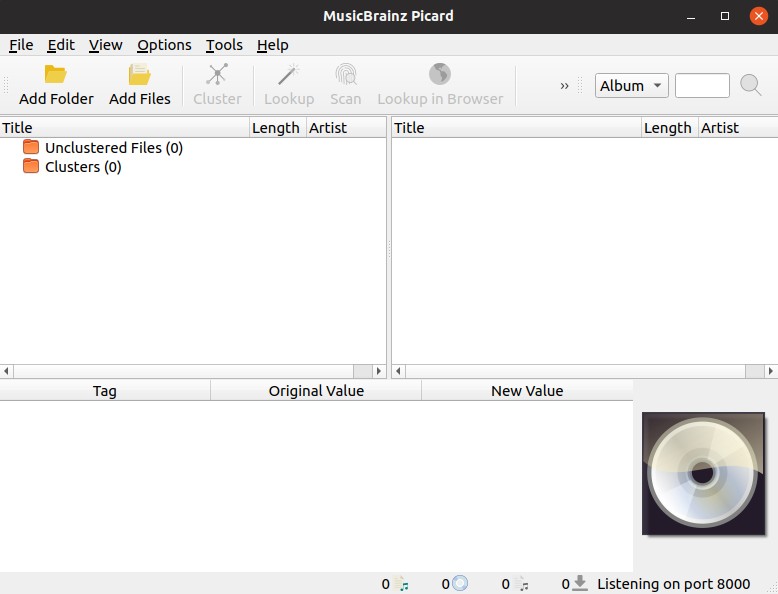
MusicBrainz Picard is a free and opensource cross platform audio music tagger for Linux, Windows and macOS. It is written in Python and released under open source licence. Using this you can identify, tag and organizing your digital music audio files. It supports audio formats like MP3, FLAC, OGG, M4A, WMA, WAV, and more. MusicBrainz Picard uses AcoustID audio fingerprints to be identify audio files. It supports music CD lookup and plugins. Using plugins you can extend its feature.
Install MusicBrainz Picard audio tagger on Ubuntu:
In Ubuntu you can install the MusicBrainz Picard audio tagger via official PPA and flathub.
Install Picard via PPA:
Open your terminal (Ctrl+Alt+T) and type the below command and hit the enter key.
sudo add-apt-repository ppa:musicbrainz-developers/stable
Then press the ENTER key to confirm the addition of MusicBrainz Picard’s official PPA on your Ubuntu system. Then run the below command.
sudo apt-get update
Then run the below command to install MusicBrainz Picard audio tagger on Ubuntu.
sudo apt install picard
During the installation press y and enter to confirm the installation . After the successful installation of MusicBrainz Picard audio tagger, click the show applications in the Ubuntu Gnome dock and type MusicBrainz Picard in the search box and click MusicBrainz Picard to open it.
If you want to try the latest development version of MusicBrainz Picard audio tagger on Ubuntu, you need to add the below PPA. Follow the same above method for the installation.
sudo add-apt-repository ppa:musicbrainz-developers/daily
sudo apt-get update
sudo apt install picard
Install Picard via flatpak:
You can also install MusicBrainz Picard via flatpak on your Ubuntu system. First you need to install and setup
flatpak on your your Ubuntu system. Please follow the below link for Flatpak installation tutorial.
How to install flatpak on ubuntu:
After the installation of flatpak in you Ubuntu, run the below command in your terminal to install the MusicBrainz Picard audio tagger.
flatpak install flathub org.musicbrainz.Picard
During the installation it will ask like this “Do you want to install it?[Y/n]”. Type y and press the enter to start the installation. it will ask one more time to confirm it like that. You can run MusicBrainz Picard audio tagger by running the below command terminal.
flatpak run org.musicbrainz.Picard
If you want to uninstall MusicBrainz Picard audio tagger flatpak package, then simply run the below command.
flatpak uninstall org.musicbrainz.Picard


Pingback: How to install Tauon Music Box on Ubuntu | CONNECTwww.com