vnstat is a free and open source network traffic bandwidth monitoring tool for Linux and BSD. It is released under GPLv2 license. It uses kernel as information source and light use of system resources. You can get the traffic details by 5 minute, hourly, daily, monthly, weekly, yearly, top days basic. You can also get the live traffic details. It is a simple and easy to use tool. You don’t need to root access to get the details.
Install vnstat on Ubuntu:
You can install vnstat network traffic monitoring tool via the default Ubuntu package manager. Open your terminal console app (ctrl+alt+t) and run this command to update the software source list.
sudo apt update
Enter your user password. Then run vnstat installation command.
sudo apt install vnstat
Then start the vnstat service by using below command.
sudo systemctl enable --now vnstat
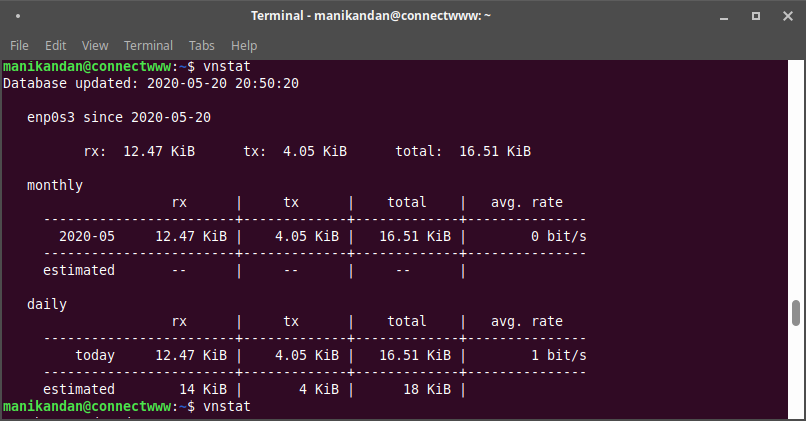
Wait some time (5 minutes) and then run this command to monitor and view your network traffic bandwidth using vnStat.
vnstat
It will take some time to show the traffic details. Otherwise you will get .
“enp0s3: Not enough data available yet.” error. Here enp0s3 is my network interface.
You can check your network interface by using this command.
ip addr
For the complete vnstat usage details.
vnstat --help
To view the live usage details.
vnstat -l
You can stop it by press ctrl+c
You can view your daily usage by this command.
vnstat -d