XAMPP, an acronym for cross-platform (X), Apache (A) server, MariaDB (M), PHP (P), and Perl (P), is a comprehensive software stack developed by Apache Friends. It serves as a local host or server, allowing users to test websites or applications before deploying them on a remote server or computer.
This guide provides a detailed, step-by-step approach to installing XAMPP on your Ubuntu system.
Installing XAMPP on Ubuntu
Follow these steps to download, install, and configure XAMPP on your Ubuntu system:
Begin by downloading the XAMPP package for Linux from the official Apache Friends website. Navigate to the website, select the “XAMPP for Linux” option, and you will be presented with the choice to either Run the package or Save it to your system. It is recommended to opt for the “Save File” option, ensuring that the package is downloaded to your default Downloads folder.

To install the package, we’ll leverage the Ubuntu command line, known as the Terminal. You can open the Terminal using the Dash or the convenient Ctrl+Alt+T shortcut. Once the Terminal is active, navigate to your Downloads folder to locate the file. Here, you’ll need to grant the file executable permissions and then proceed to execute it. This straightforward process ensures a seamless installation of the package on your
In the terminal run below commands one by one.
Note: Here “xampp-linux-x64-8.2.12-0-installer.run” is the downloaded file name. You can change below commands based on your file name and path.
cd Downloads
sudo chmod +x ~ xampp-linux-x64-8.2.12-0-installer.run
sudo ./xampp-linux-x64-8.2.12-0-installer.run
This action initiates the Setup wizard, guiding you through the remaining steps of the installation process.
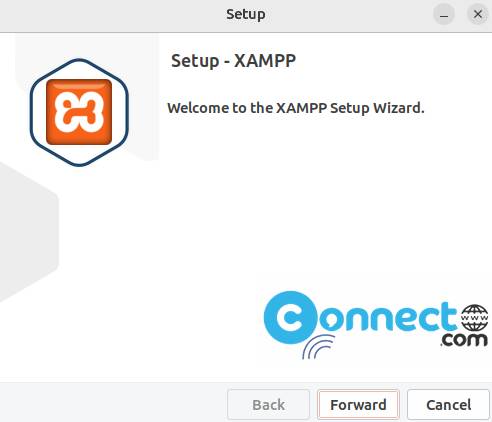
Click the “Forward” button to commence the installation process:
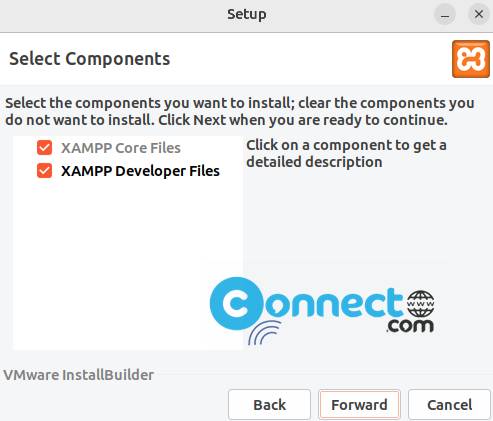
In the subsequent dialog, you can select the specific XAMPP components you wish to install. It is recommended to maintain the default settings for a standard installation. Click the “Forward” button to proceed. The ensuing dialog will provide details about the designated installation location for XAMPP.
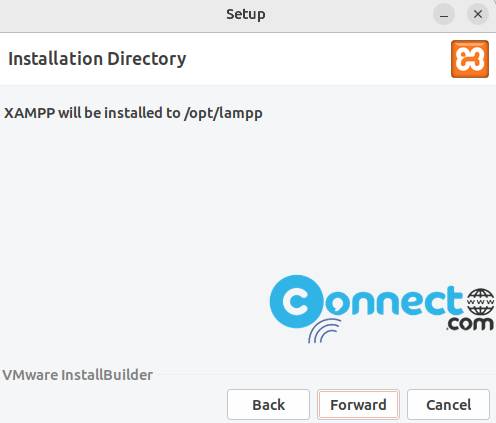
Click “Forward” to initiate the installation process:
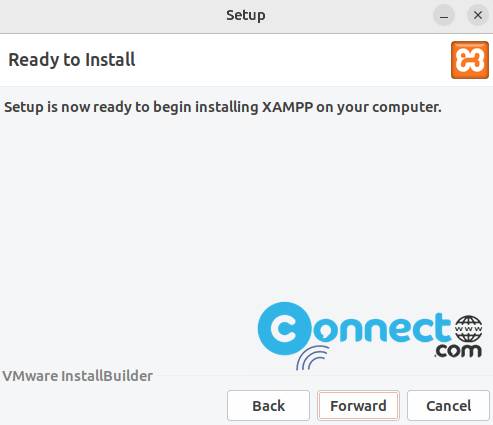
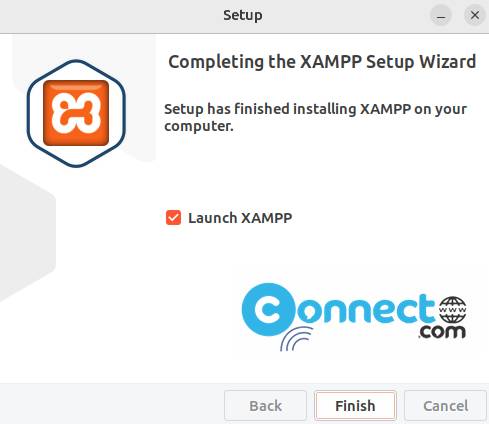
Once the installation concludes, click the “Forward” button. The ensuing dialog signals the successful completion of the installation process.
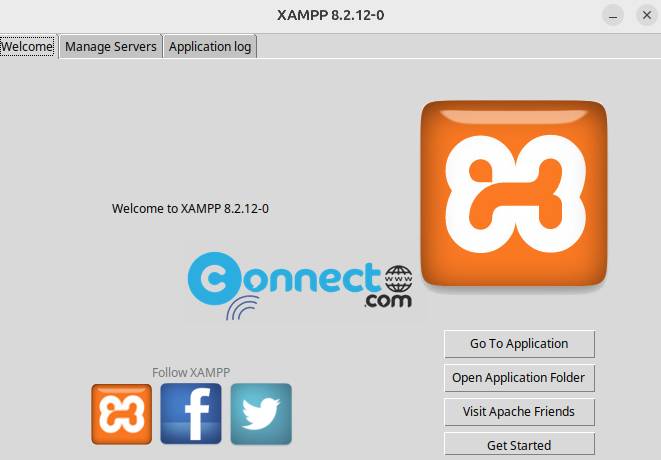
Starting XAMPP on Ubuntu [Via Terminal]
To launch XAMPP via the Ubuntu Terminal, enter the following commands sequentially. The initial command installs net-tools if not already present, and the subsequent one starts XAMPP.
sudo apt install net-tools
sudo /opt/lampp/lampp start
After successfully installing XAMPP on your Ubuntu system, it’s advisable to verify the installation. To do this, open your Firefox browser and enter the following URL:
http://localhost
You can also verify the installation of phpMyAdmin in a similar manner by entering the following URL in your browser:
http://localhost/phpmyadmin
Stop XAMPP Server on Ubuntu
Use the following command to stop the XAMPP server from command line:
sudo /opt/lampp/lampp stop
Uninstall XAMPP on Ubuntu
It’s equally essential to understand the process of completely uninstalling and removing XAMPP from your Ubuntu system when necessary.
Open the Ubuntu Terminal and navigate to the directory where XAMPP is installed, which is:
cd /opt/lampp
The next step is to run the uninstall program you will find in the lampp folder through the following command:
sudo ./uninstall
The next dialog will prompt, seeking your confirmation to uninstall XAMPP along with all its modules:
Enter your password if prompted for the sudo password and press <enter>. The system will request your confirmation before proceeding. Type ‘Y’ and hit <enter> to affirm your choice.
Following a brief duration, the output will confirm the completion of the uninstallation process with the message “Uninstallation completed.”
To conclude, you can delete the XAMPP directory using:
sudo rm -r /opt/lampp
At this point, XAMPP and all its modules have been successfully uninstalled from your system. Additionally, if you wish, you can delete the downloaded installation package for a cleaner system.