The ZSH or Z shell is one of the most powerful shells ever developed, and it’s also one of the fastest. Functioning as an advanced Unix shell tailored for Linux/Unix systems, ZSH introduces unique features like built-in spell-checking, code syntax highlighting, and more. Additionally, it allows users to customize the command prompt to effortlessly display pertinent information about the system status without manual input.
Installing Z Shell ZSH on Ubuntu
Begin by ensuring your system is up-to-date with the latest software and security patches using the following commands:
sudo apt update && sudo apt upgrade -y
Now that your system is refreshed, proceed to install ZSH using the apt command.
sudo apt install zsh
During the installation, you’ll be prompted to confirm the Z shell installation. Type ‘Y’ and press Enter to proceed. The installation process may take some time and will cover basic ZSH configuration. While these settings can be adjusted later, for now, there’s no immediate need to modify them.
Once ZSH is installed, verify the version number with the following command:
zsh --version

If the ZSH version number is not displayed, there might be an issue with the installation. Double-check your path or consider reinstalling ZSH using the following commands:
sudo apt install zsh && sudo dpkg-reconfigure dash && sudo reboot
These commands will reinstall ZSH, reconfigure the dash shell, and initiate a system reboot if necessary, ensuring a smooth installation.
Configure Z Shell ZSH on Ubuntu
Configuring Zsh in Ubuntu provides an opportunity to tailor the shell environment, enhance productivity with intelligent tab completion, and harness the scripting capabilities of Zsh. Unlike Bash and other shells, Zsh necessitates initial configuration when launched for the first time. To initiate Zsh, type the shell name in the terminal and press Enter:
zsh
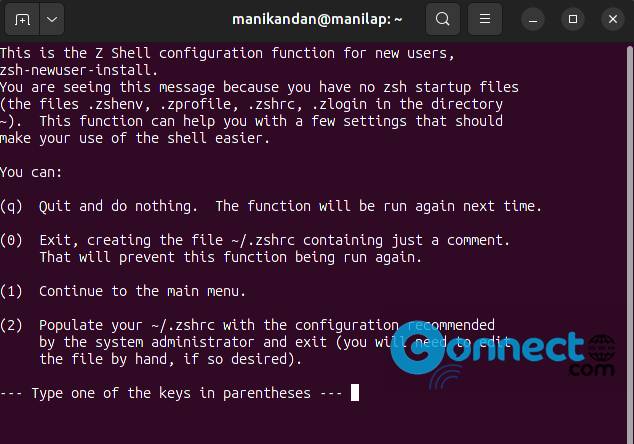
Initial Zsh configuration in Ubuntu.
Press 1 to access the main menu and configure each setting individually.
Press 2 to populate the .zshrc configuration file with default parameters, which can be later manually adjusted in the .zshrc file.
Press 0 to create an empty .zshrc configuration file and customize everything from scratch.
Press ‘q’ to exit the configuration, saving changes to be applied the next time Zsh is accessed.
Upon completing the setup, the changes are saved, and the Z Shell prompt appears. The initial configuration only appears during the first run of the shell. However, you can rerun the initial setup using the following command:
zsh-newuser-install
Set Zsh as Default Shell in Ubuntu
After installation, Zsh is not configured as the default shell. To make Zsh your default shell, follow these steps:
Check the default shell on your system:
echo $SHELL
Use the chsh (change shell) command to modify the default login shell. The syntax is as follows:
chsh -s [path] [user]
[path]: Specifies the path to the desired shell.
[user]: Specifies the user for whom the default shell should be changed. Omitting [user] alters the default shell for the current user.
If uncertain about the shell path, use the which command to automatically specify the Zsh path, as shown:
chsh -s $(which zsh)
Enter the root password when prompted and press Enter. The command changes the default shell to Zsh for the current user. To start using the Z Shell, log out of the terminal and log back in.