LXQt is a free and open source fast and lightweight and Qt based desktop environment for Linux and BSD. It uses very low system resources. It is based on the merger of LXDE and Razor-qt desktop environments. Some Linux distributions that offer a version with LXQt desktop environment are ALT Linux, Arch Linux, Artix, Debian, Devuan, Fedora, FreeBSD, Gentoo, Mageia, Manjaro, OpenMandriva, OpenMandriva Lx, ROSA Linux, openSUSE, Ubuntu and Void Linux.
Install LXQt Desktop Environment on Ubuntu Linux
If you want the out of box Ubuntu and LXQt experience then you can also try Lubuntu directly. Or you can install LXQt on your exciting Ubuntu system using the below method.
Open the command-line terminal app (ctrl+alt+t) and run below commands one by one.
sudo apt-get update
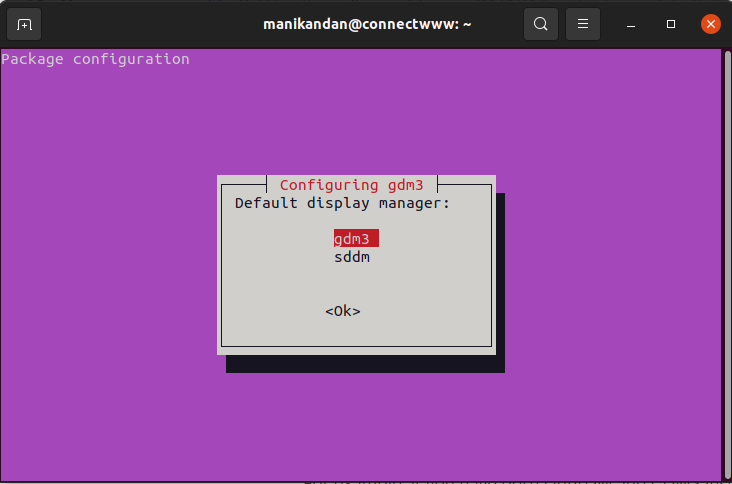
sudo apt install lxqt sddm
The above command install LXQt and simple desktop display manager on your system. During the installation you change your display manager to SDDM.
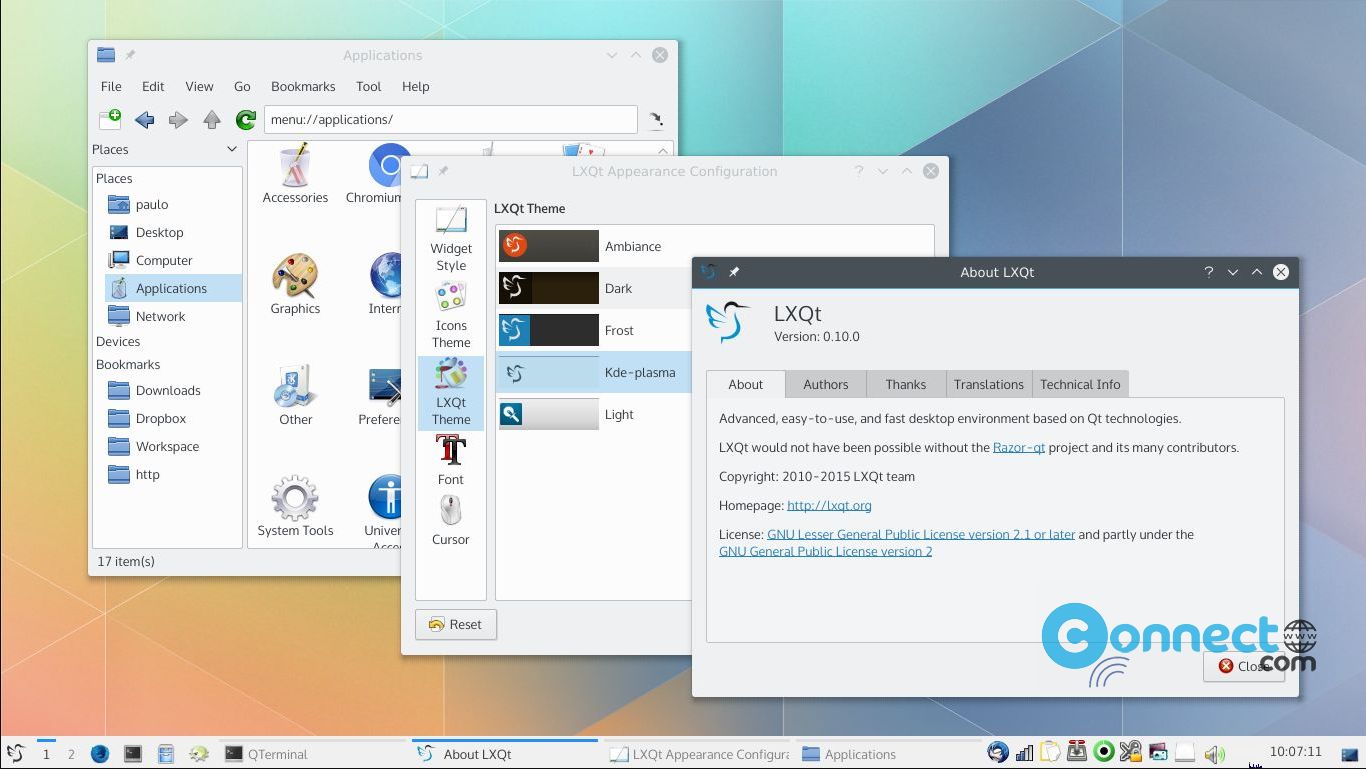
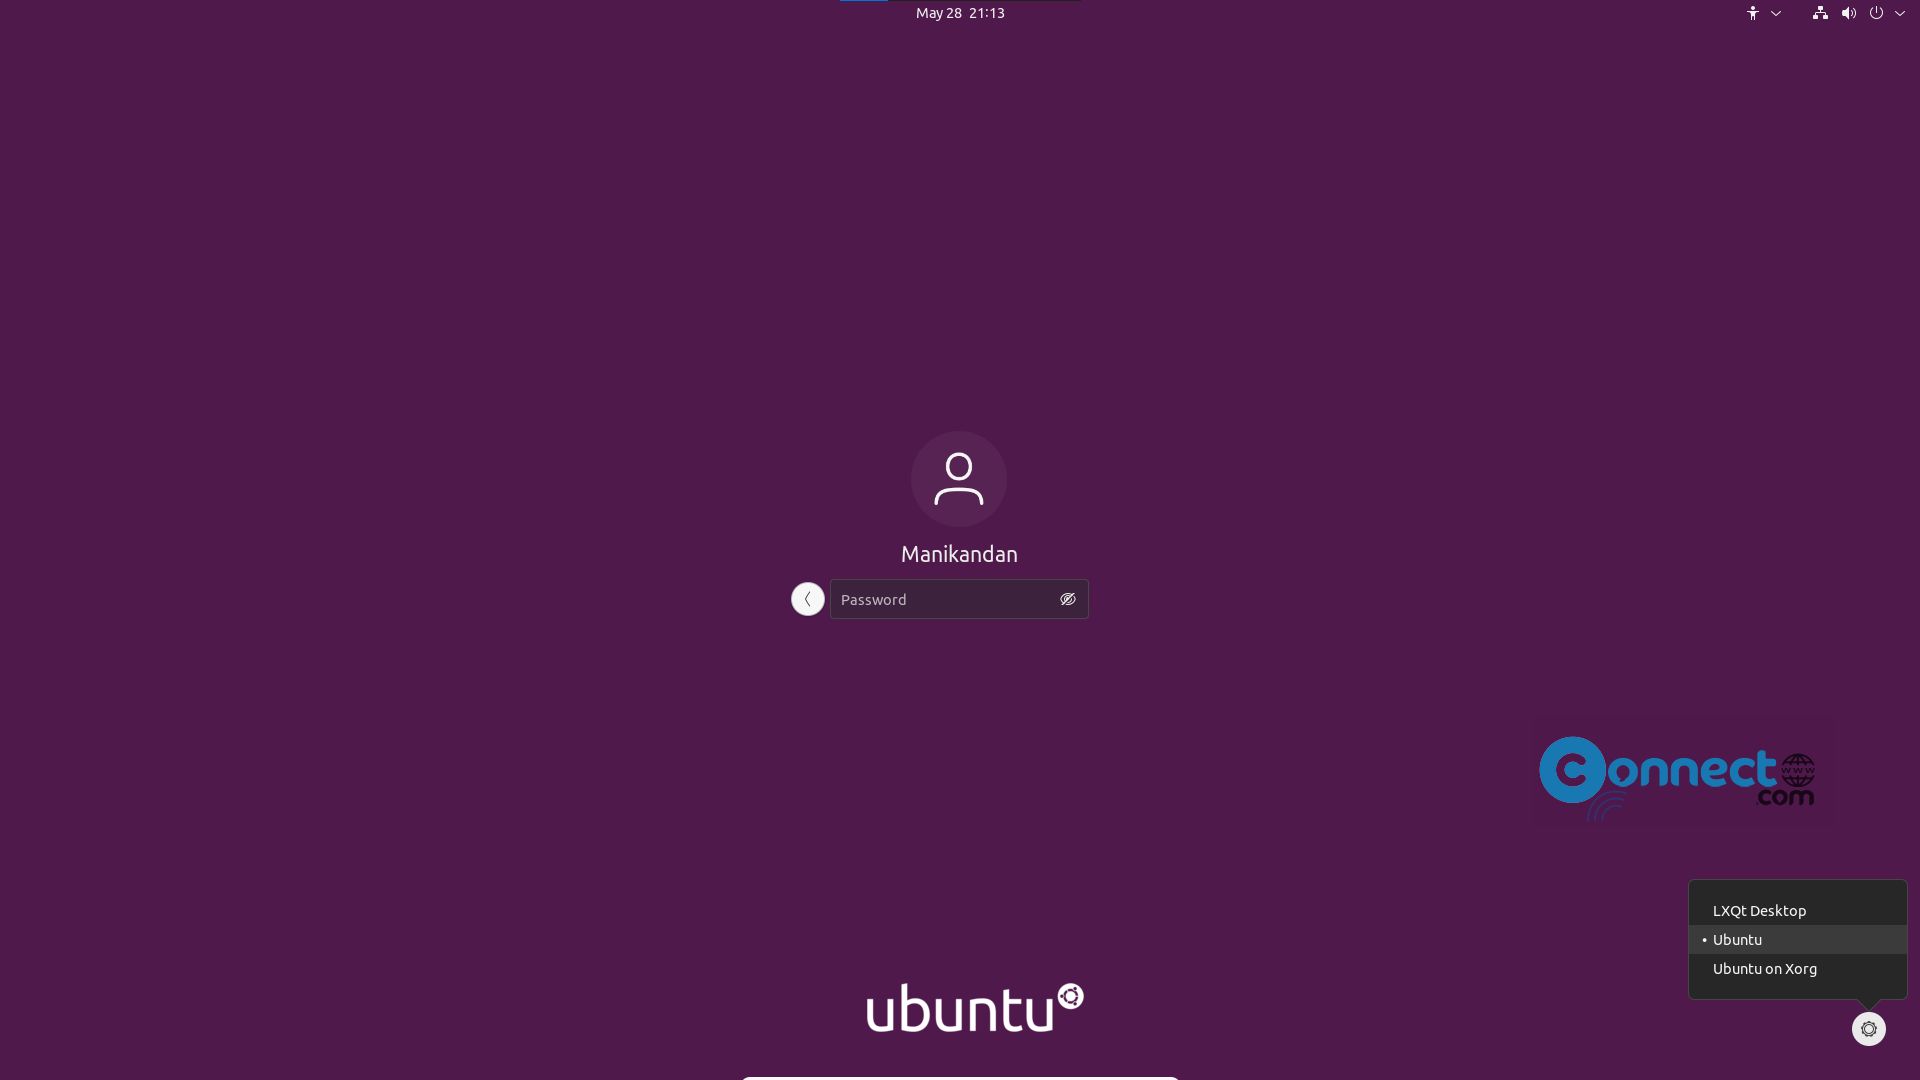
After the successful installation, restart your system and choose LXQt desktop at the login interface.
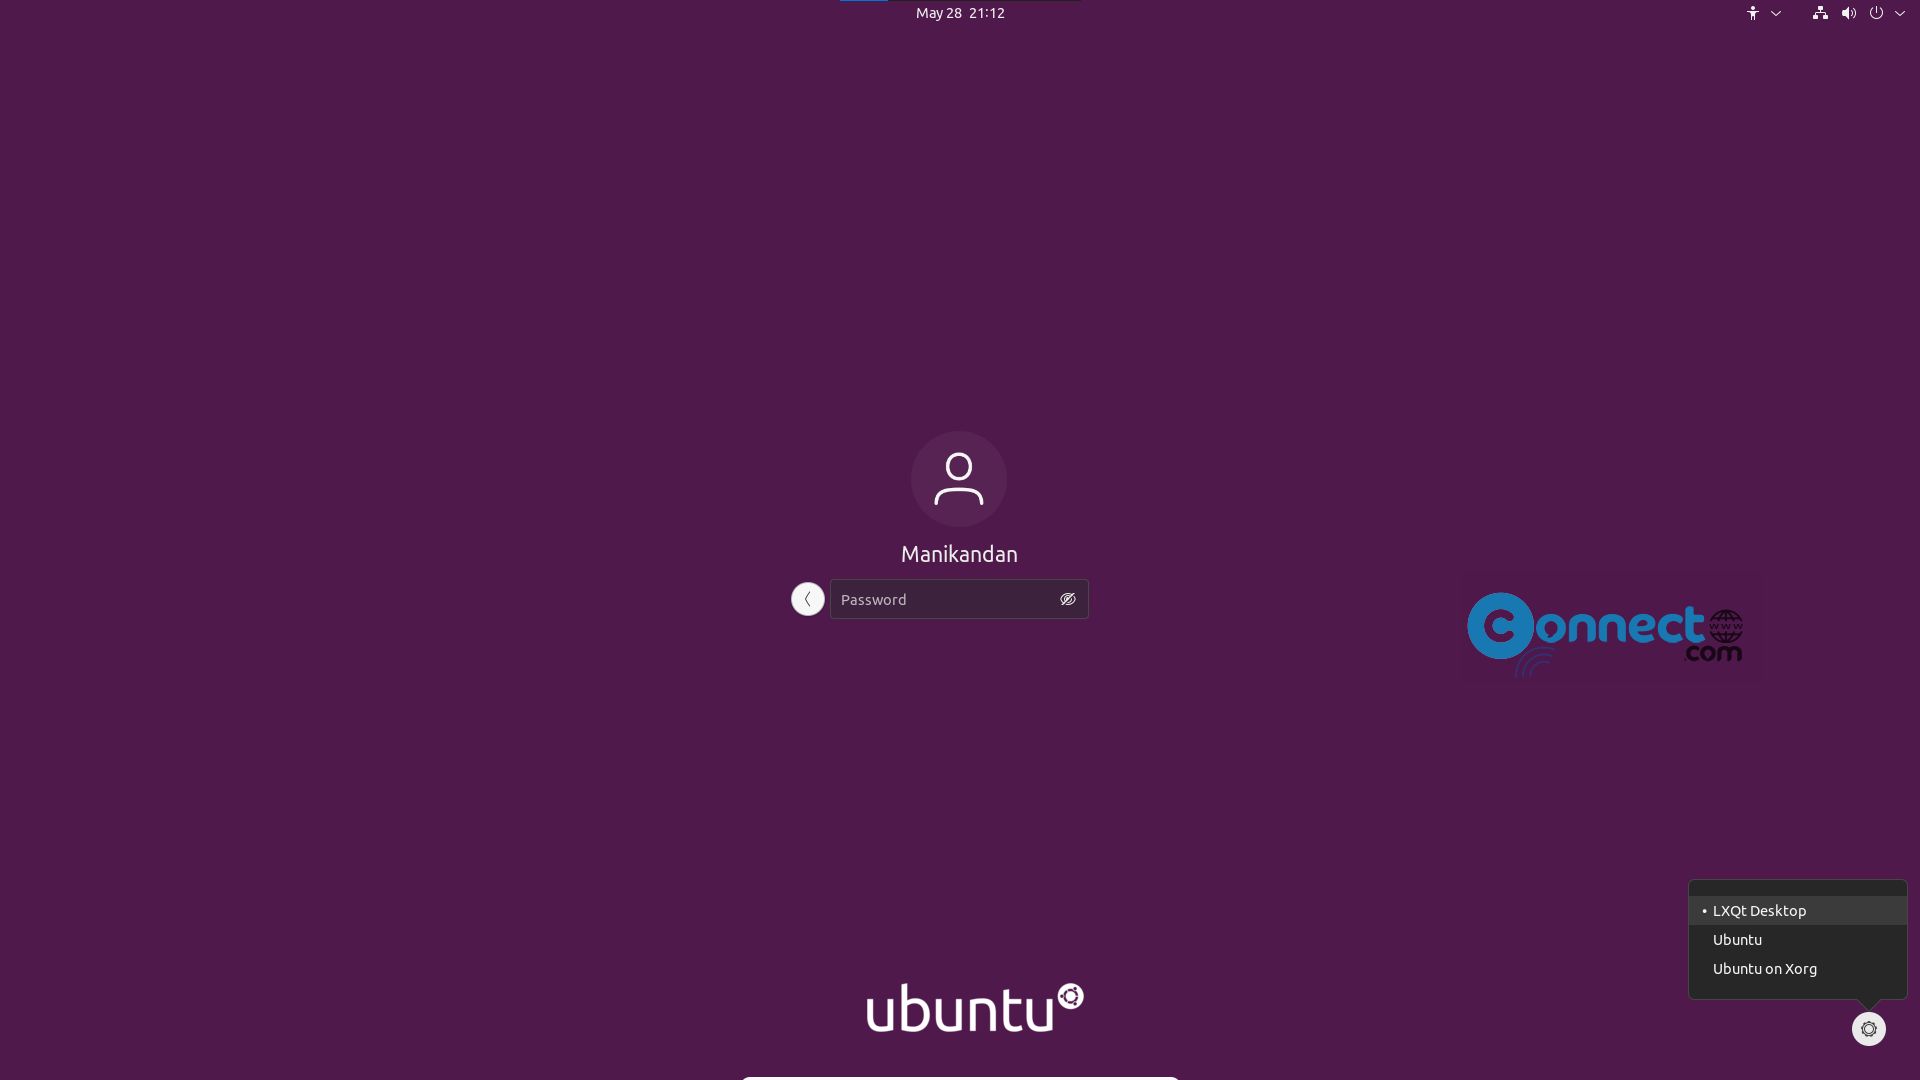
If you don’t like or want to return to default Ubuntu just restart your system and select Ubuntu at the login interface.
And you can also remove LXQt and SDDM via below commands. Before removing switch to Ubuntu and run command.
sudo apt purge lxqt sddm
sudo apt autoremove
Restart your system. If you get the tty screen that this without GUI, just enter your Ubuntu user name and press enter key and then Ubuntu user password and press enter key. It will login your system in command-line mode. Now run below command.
sudo systemctl restart gdm
Watch Video
That’s all