Composer is a free dependency management tool for PHP and developed by Nils Adermann and Jordi Boggiano. It provides a standard format for managing dependencies of PHP software and required libraries. It is a widely used script in the PHP world .
Install Composer on Ubuntu:
Open your terminal app and type the below command and hit enter to update the package manager cache.
sudo apt-get update
Then install all composer dependencies by using the below command.
sudo apt-get install curl php-cli php-mbstring git unzip
There are two ways to install Composer. Locally as part of your project (per project basis), or globally as a system wide executable.
Method 1: Install locally on your project (per project basis)
Go to root of your project by using below command in terminal
cd your_project_path
Example: if your project is on home/www/project, then
cd www/project
After that download the composer-setup.php file in your project root via below command.
curl -sS https://getcomposer.org/installer -o composer-setup.php
Then execute the below command in terminal to generate a composer.phar file in your current project directory.
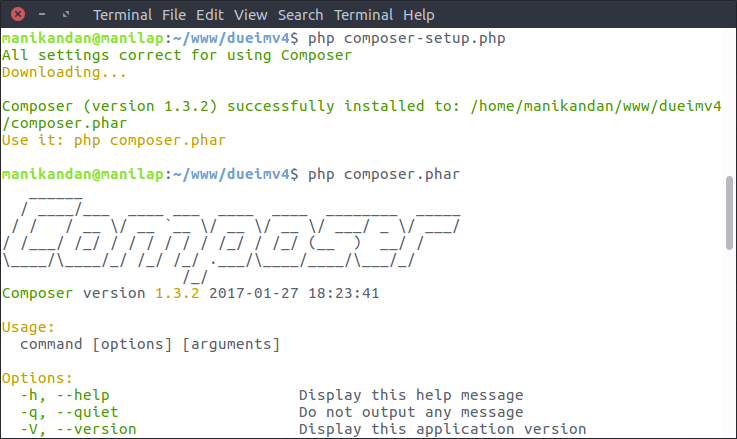
php composer-setup.php
Then type below command to verify the composer.
./composer.phar
Method2: Install globally on your system
In terminal execute below commands
cd ~
curl -sS https://getcomposer.org/installer -o composer-setup.php
Then use below command
sudo php composer-setup.php --install-dir=/usr/local/bin --filename=composer
To test your composer global installation, run the below command in terminal
composer
How to use composer on your project:
To use Composer in your project, you’ll need a composer.json file. It tells Composer which dependencies it needs to download for your project, and which versions are allowed to be installed.
Create composer.json file in your project root folder. And type below code in your composer.json file.
Note: Replace vendor/package”: “1.3.2” with your your package vendor name, package name and package version.
{
"require": {
"vendor/package": "1.3.2"
}
}
Example: I need picofeed for my project. Picofeed is a Modern library to handle RSS/Atom feeds. For that go Packagist PHP Package Repository ( https://packagist.org/ ) and search for picofeed.
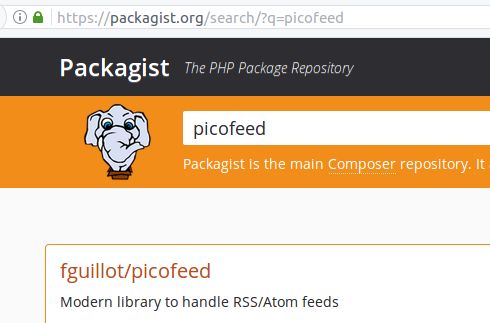
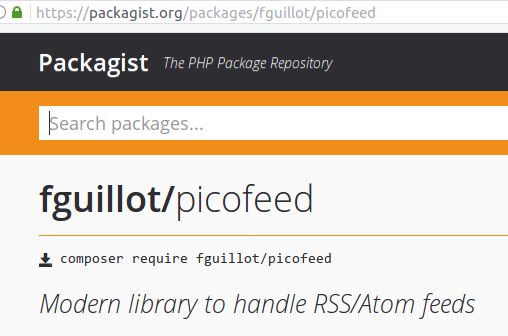
Here vendor is fguillot and package name is picofeed and the current picofeed version is 0.1.31
Example: “fguillot/picofeed”: “0.1.31”
So your composer.json file will look like below
{
"require": {
"fguillot/picofeed": "0.1.31"
}
}
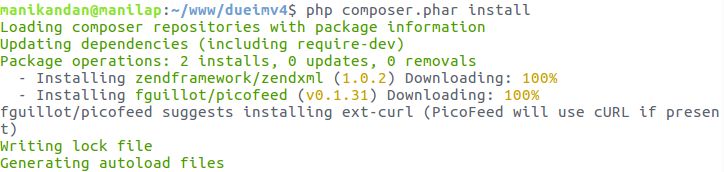
Then run the below code to install all dependencies.
php composer.phar install
Auto-loading:
Composer automatically generates an autoload.php file in your project root /vendor folder. You can include in your project to start using the classes from those libraries. In your project, just specify the below code to include.
require 'vendor/autoload.php';