If you’ve ever found it challenging to distinguish between regular text and hyperlinks on certain websites, and you wish for a more straightforward way to identify links while browsing, Firefox has introduced a handy solution. Starting from version 121.0, Mozilla has included a feature that allows users to enforce a continuous underline for all links across various websites. Enabling this feature ensures that hyperlinks are consistently displayed with underlines, making it easier for you to differentiate between text and clickable links on any webpage.

If you’re using Firefox version 121 or later and want to activate the “Always underline links” feature, here are two methods to achieve this:
Method 1: Using Firefox Settings
1: Open the Firefox Settings page by clicking on the three-lines Hamburger menu icon at the right end of the toolbar. Alternatively, you can directly access the Settings page by entering ‘about:preferences’ in the address bar.
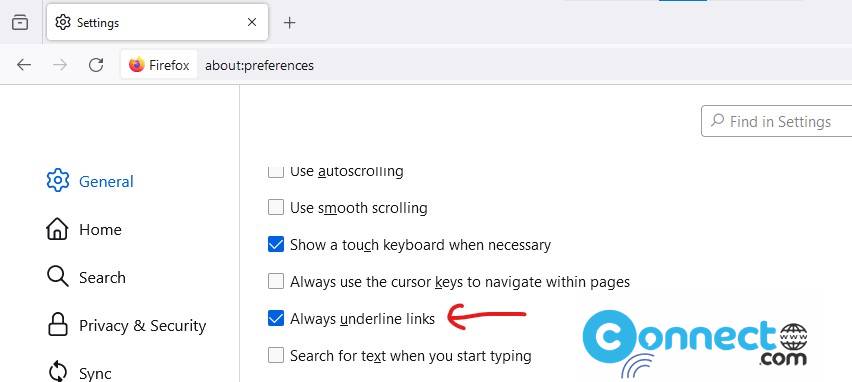
2: Within the Settings page, select the General section from the left sidebar. Scroll down to the Browsing section on the right side.
3: Locate the newly added option “Always underline links” and enable it. Firefox will instantly apply underlines to all links on websites you visit.
To revert to the default setting and remove underlines from links in the future, simply disable the “Always underline links” option.
Method 2: Using Firefox about:config Page
For advanced users, Firefox provides an alternative method to activate the persistent link underlining feature through the hidden about:config page.
1: Open Firefox and type ‘about:config’ in the address bar, then press Enter. Accept the warning message by clicking on “Accept the Risk and Continue.” This action will open Firefox’s advanced configuration page.
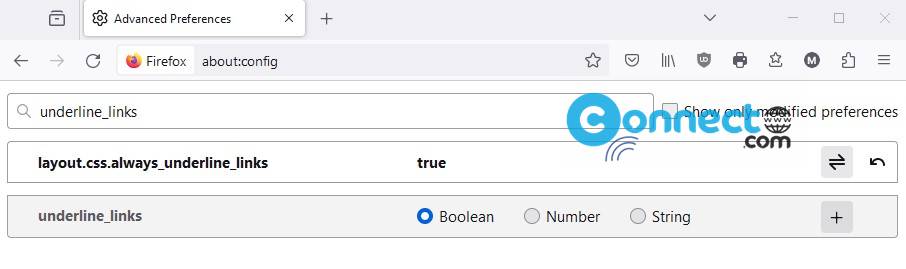
2: In the about:config page, type ‘underline’ in the Search filter box. Look for the preference ‘layout.css.always_underline_links.‘
3: To enable the continuous underline for links, set the preference ‘layout.css.always_underline_links’ to ‘true.’ You can do this by double-clicking on the preference, toggling its value.
By following these steps, you’ll promptly enable underlines on all links in your Firefox browser. If you wish to deactivate this feature in the future, set the preference ‘layout.css.always_underline_links’ back to ‘false.’
This straightforward guide ensures that you can easily manage link underlining preferences in Firefox, enhancing your browsing experience.