Are you seeking an effective way to communication with your website visitors on WordPress? Look no further than the Contact Form 7 plugin. Contact Form 7 bridge the gap between you and your audience. Contact Form 7 is a powerful yet free WordPress plugin to facilitate the creation of contact forms for your website.
Key Features of WordPress Contact Form 7:
Multiple Contact Forms: Create and manage multiple contact forms.
Free Version: Enjoy full functionality without any premium subscriptions.
Customizable Forms: Tailor forms to suit your specific needs and branding.
Ajax-Powered Submissions: Experience smooth, dynamic form submissions without page reloads.
CAPTCHA Integration: Safeguard your forms against spam with built-in CAPTCHA support.
Akismet Anti-Spam: Leverage Akismet integration to filter out spam submissions.
Form Tag Syntax: Utilize intuitive form tag syntax for easy form creation and customization.
Customizable Mail Templates: Personalize email notifications to match your branding and preferences.
File Upload Support: Enable users to attach files securely to their submissions.
Localized Translations: Reach a global audience with localized language support for translations.
Installing WordPress Contact Form 7:
To integrate Contact Form 7 into your WordPress site, follow these simple steps:
Navigate to your WordPress Dashboard.
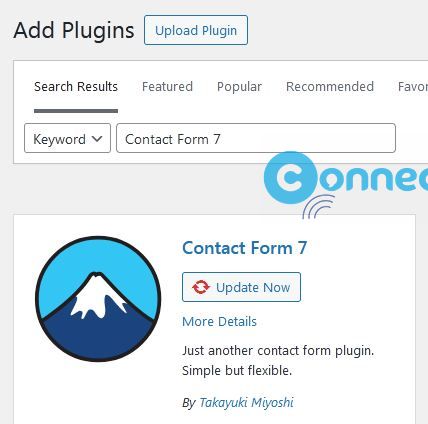
Go to Plugins > Add New.
Search for “Contact Form 7.”
Install and activate the plugin.
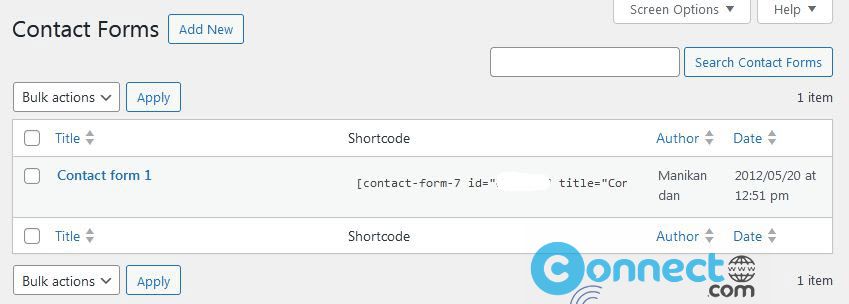
Once activated, you’ll find the “Contact” menu added to your dashboard. Begin by exploring the dummy form provided under Contact > Contact Forms.
Creating a Customized WordPress Contact Form:
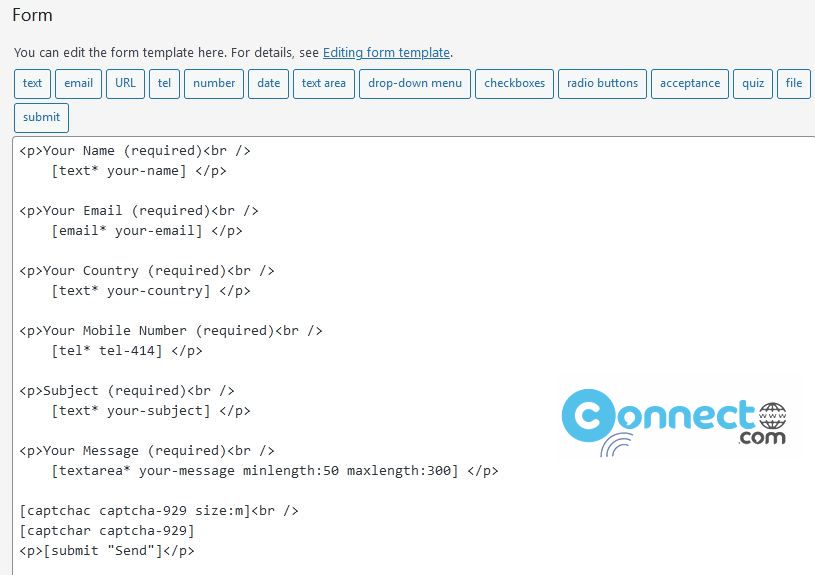
Access the Contact tab on your WordPress dashboard and click “Add New.” Provide a name for your contact form and save your settings. Use the text form tag within Contact Form 7 to create input fields for information such as name or subject. Customize the field options, including Field Type, Name, Default Value (optional), Akismet integration, and ID/Class Attributes (optional).
After that, the next step is configuring the mail tab. This section empowers you to manage your mail settings, ensuring reception of submissions from your contact forms directly to your designated email inbox.
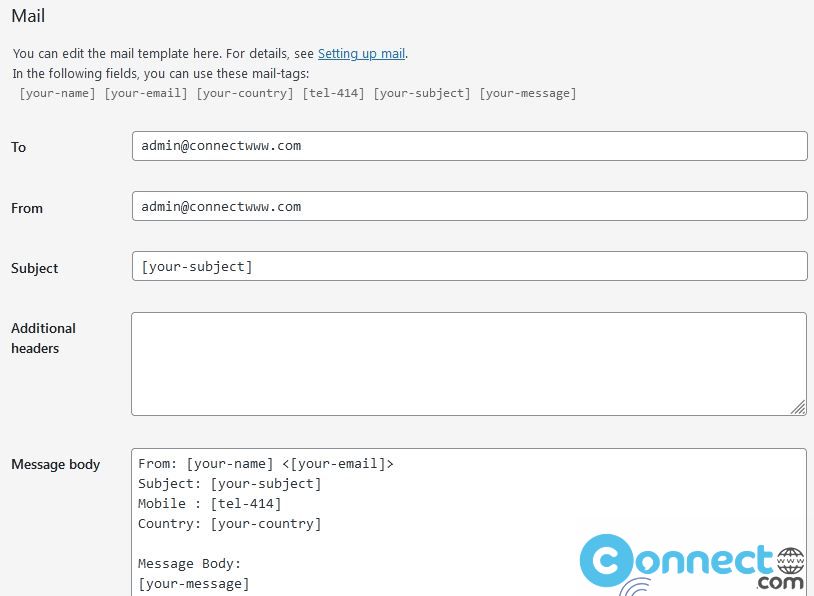
Let’s break down each field and its purpose:
To Field:
The “To Field” designates the email address where form submissions will be directed. Typically, this is your personal email or a designated inbox within your organization. Ensure it’s accurately set to receive the submitted form data.
From Field:
This identifies the sender of the email. Best practice dictates using an email associated with your domain to prevent potential spam filtering. Alternatively, fetch the email input from the form using tags like [your-email].
Subject Field:
Define a clear and concise subject line for the email you’ll receive. Opt for descriptive titles such as “New Submission from [your-name],” dynamically capturing the user’s input for their name to streamline sorting and organization.
Additional Headers:
Customize mail headers as required. A common practice is including “Reply-To: [your-email],” facilitating direct replies to the email address provided by the user.
Message Body:
Create the main content of the email you’ll receive. While Contact Form 7 offers a default template encompassing all form fields, customization options are limitless to tailor the message according to your preferences.
Use Mail (2):
Use an additional mail template if necessary. This feature proves invaluable for sending diverse emails, such as user confirmations or notifications to team members.
File Attachments:
Enable file attachments if your form includes a file upload field. Specify this option by adding the relevant form tag, such as [your-file], to reception of uploaded files as email attachments.
Save Changes:
Upon configuring your preferred mail settings, ensure to click “Save” to preserve all adjustments securely.
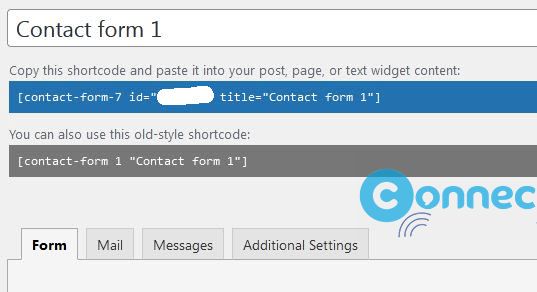
Copy the generated a shortcode and add it to your contact page.
Upon publishing your form, witness the integration of your customized contact form into your WordPress website. By optimizing your mail settings in Contact Form 7, you improve your communication channels, ensuring prompt and efficient handling of form submissions.