Kali Linux is a Debian-based Linux distribution from Offensive Security aimed at Penetration Testing, Security research, Computer Forensics and Reverse Engineering. It is a rewrite of old BackTrack Linux. And contain more than 610 penetration testing tools as pre-installed. In this tutorial i am using the below softwares to test it.
Kali linux 2020.2 (32-bit), Download Kali linux 2020.2 from here
Virtualbox 6.1.14. Download VirtualBox from here
Windows 10 (64bit) with RAM 4GB
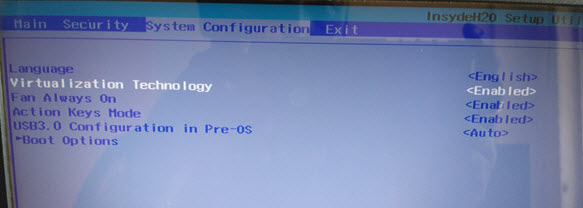
Note: If you are using 64-bit guests, you need to enable hardware virtualization in the BIOS on your host system.
Boot to your bios settings and find the virtualization or virtualization technology or hardware virtualization or VT-x or AMD-V option and Enable it.
Watch Kali Installation Video:
Install Kali Linux:
Open Oracle VM VirtualBox and click New to create a new virtual machine in your OS.
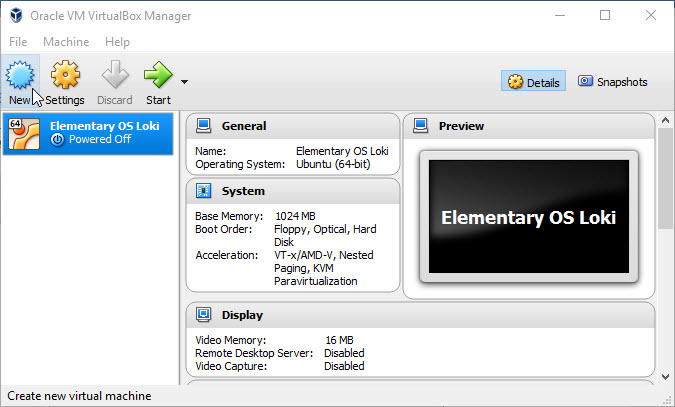
Name your Kali Linux OS, select Linux as Type from the drop down and select Ubuntu(32bit) as version and click Next button.

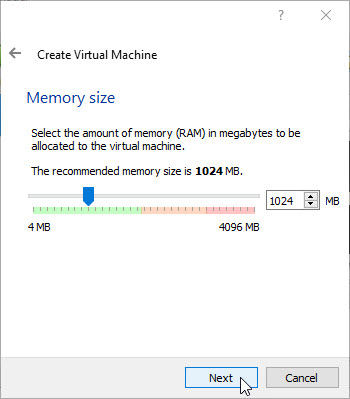
The minimum system requirements for Kali linux is 1 GB of RAM and recommended size is 2GB Ram. So set 1024 or more than 2048MB as RAM based on your system memory and click Next button.
Select Create a virtual hard drive now option and click Create button.
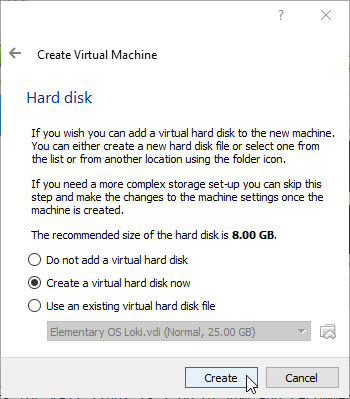
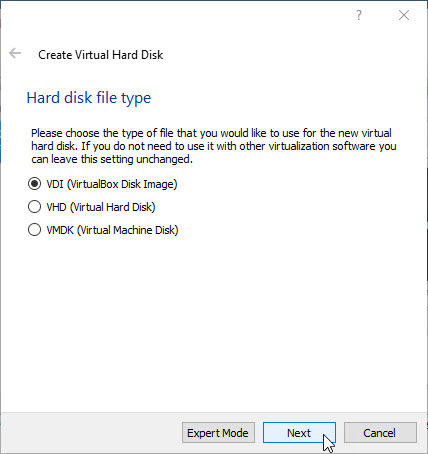
Select VDI (VirtualBox Disk Image) and click Next button.
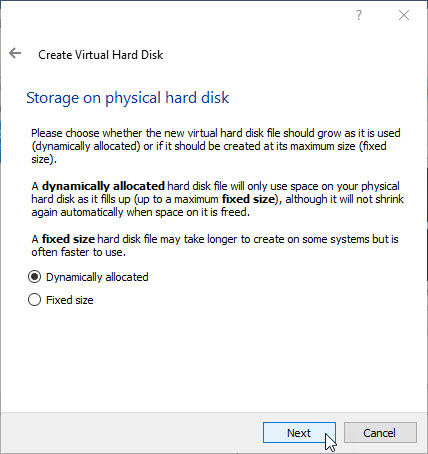
Select Dynamically allocated and click Next.
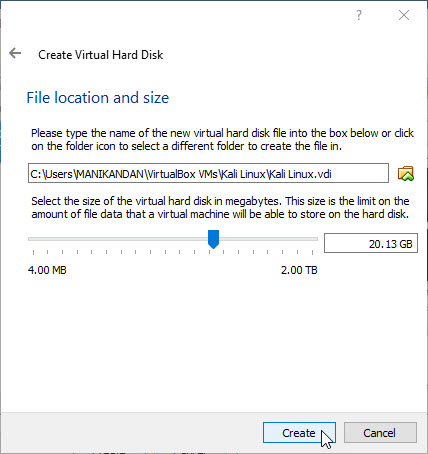
Type any name and select location of new virtual hard drive by clicking the folder icon. And select the size. Recommended size is a minimum of 20 GB of disk space for kali linux. And then click create button.
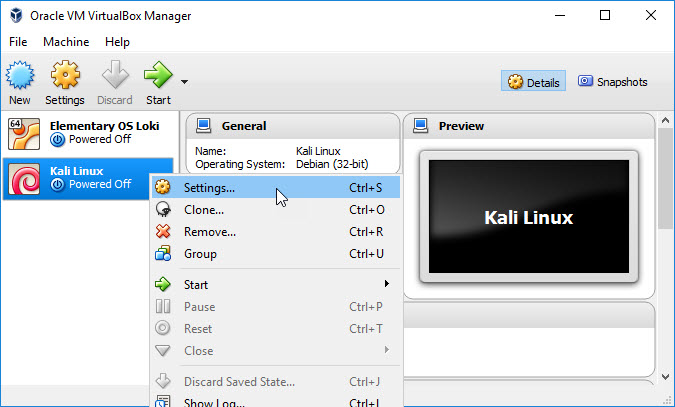
Right click on Kali Linux and select Settings.
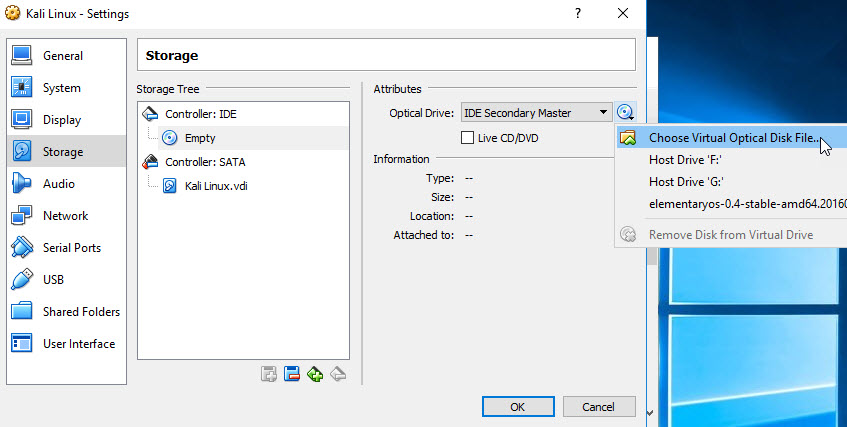
It will open the settings window. In this window select Storage from left sidebar menu and select Empty under Controller:IDE. Then click the CD icon under CD/DVD Drive and select choose a virtual CD/DVD disk file. And browse the downloaded Kali linux ISO file that is kali-linux-2016.2-i386.iso file.
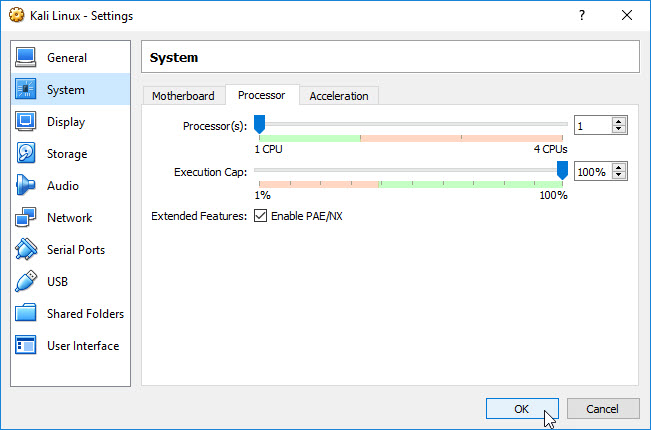
Then go to System tab from left sidebar menu and under Motherboard tab enable the Input/Output APIC. Then click the Acceleration tab and check/enable the hardware virtualization features VT-x/AMD-V and Nested paging of your CPU . Then go to the Processor tab and enable/check the PAE/NX feature and click Ok button.
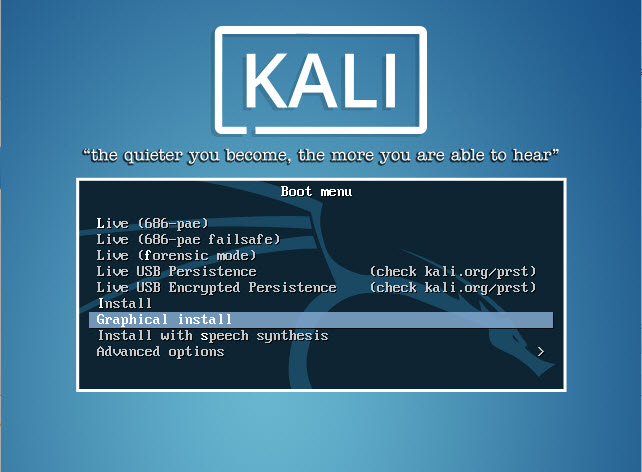
Select the Kali linux from the left side menu and click the Start button. In the kali linux boot menu select Graphical install to start the kali Linux installation process.
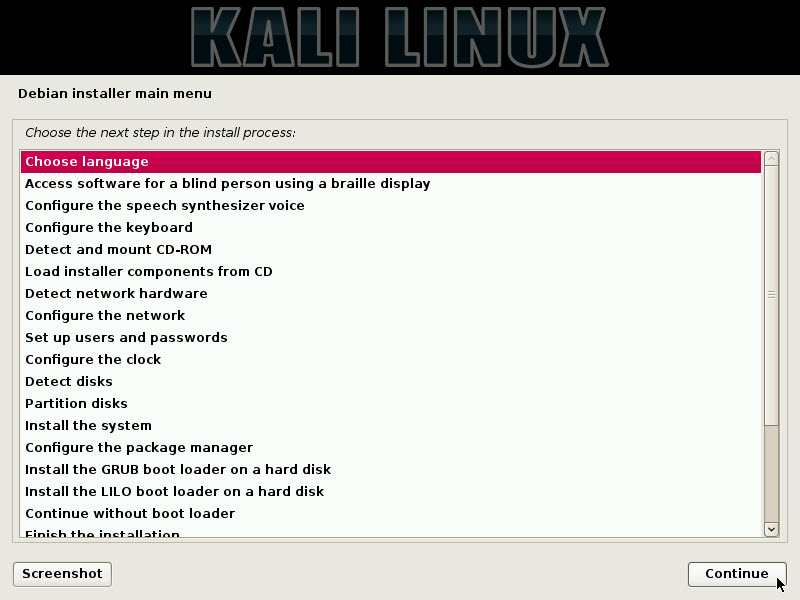
Then choose your language and country.
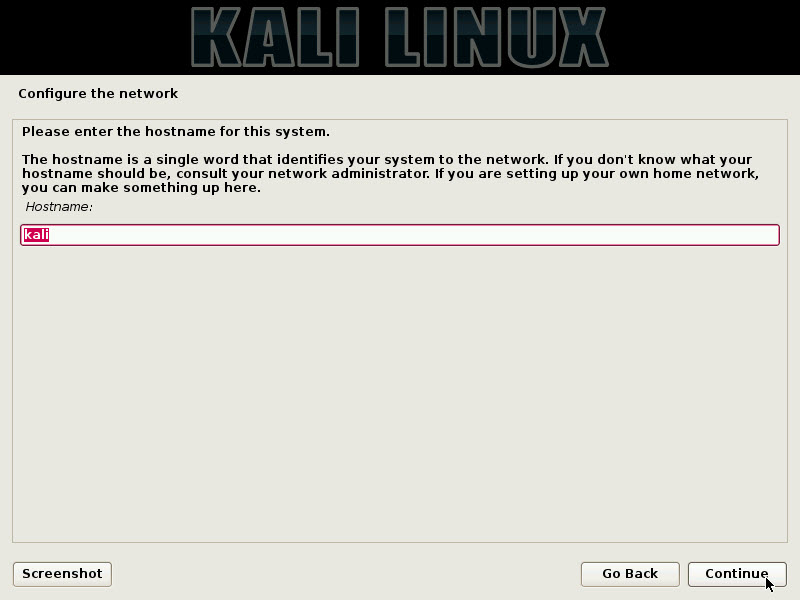
Type your Hostname or just leave as kali in that field and click continue.
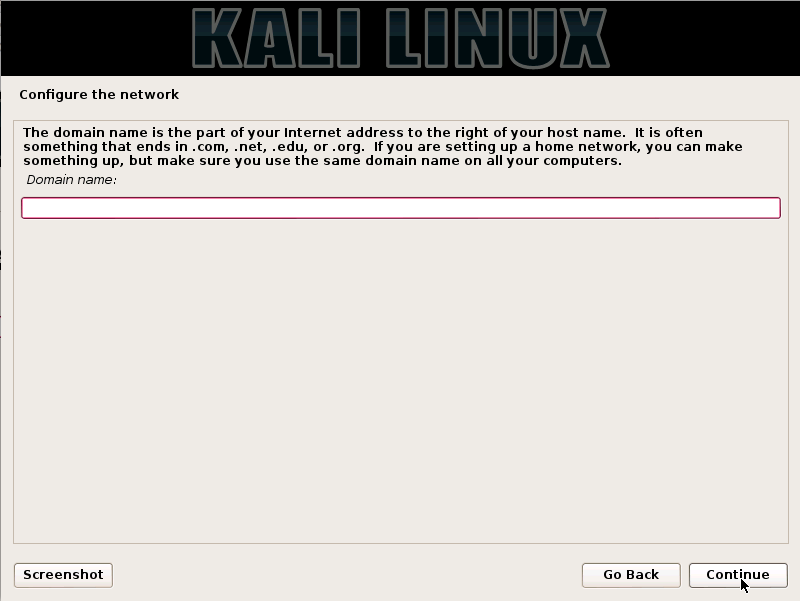
If you have a domain just type the name. If you don’t have domain, skip this process and click the continue.
Choose a good password and type it as a root password.

Then set your timezone.
After that select Guided-use entire disk option to use the entire disk on our computer. Experienced users can use the “Manual” partitioning method for more additional configuration options.

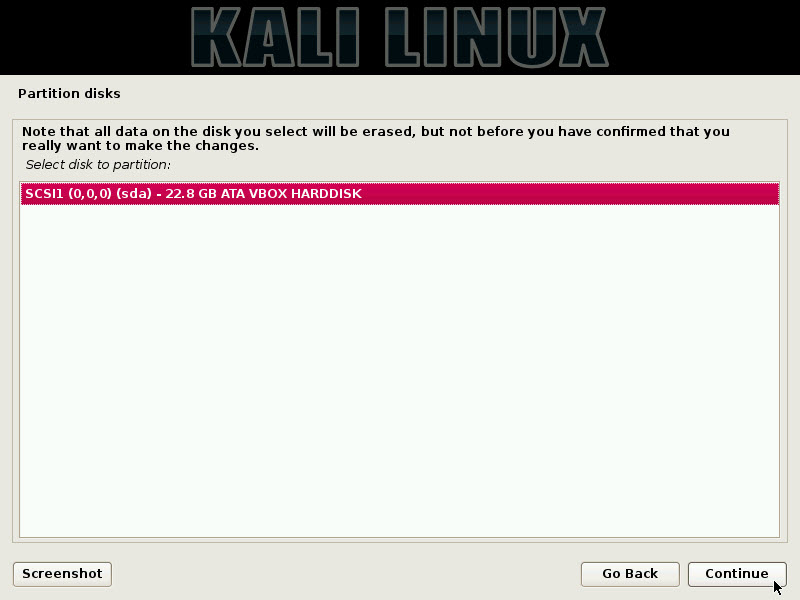
Then select your VBOX HARD DISK and click continue.
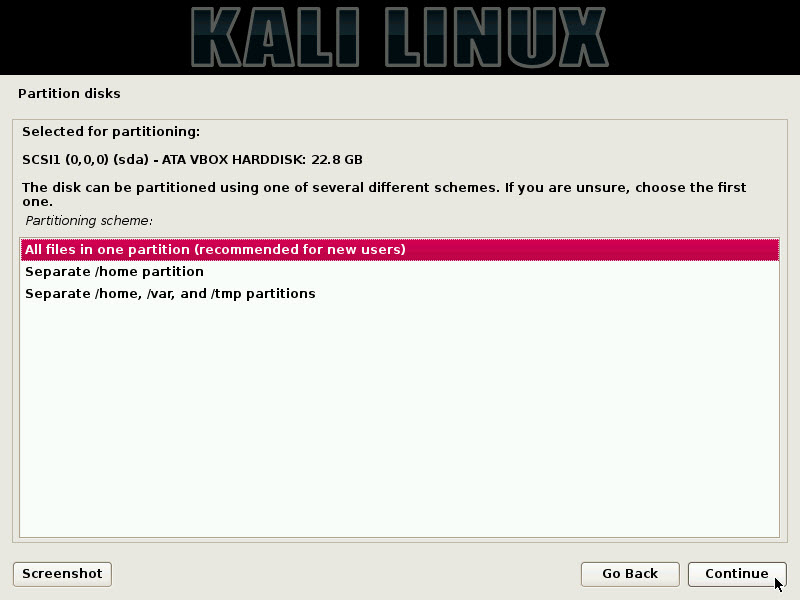
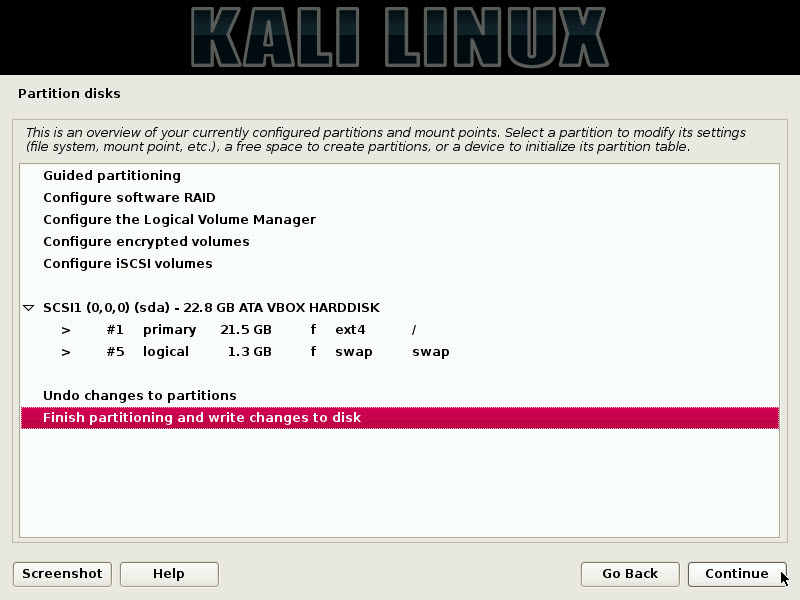
Select all files in one partition option and click the continue button.
Then select Finish partitioning and write changes to disk option.
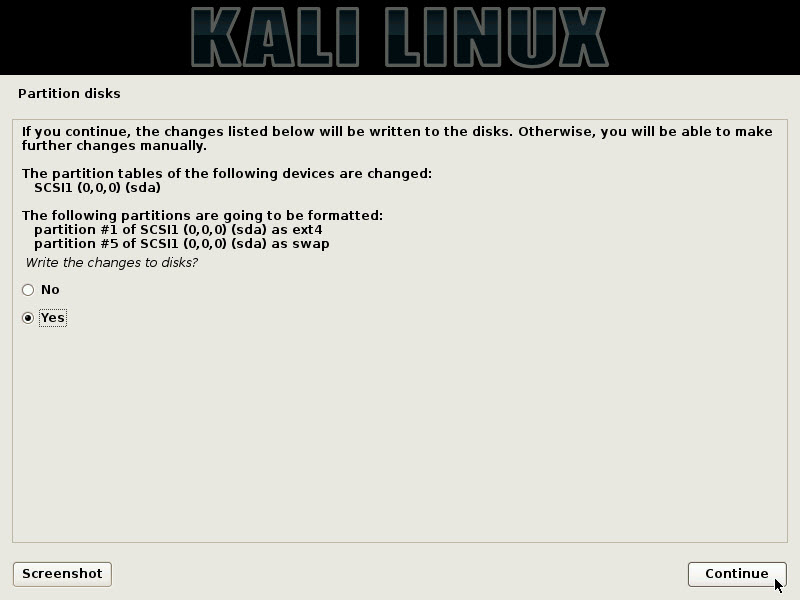
In the this option select Yes to write the changes to the disk and click continue button.
The kali Linux operating system will start installing. Wait for some minutes. It’ll take around 10 to 15 minutes depends on the speed of your computer.
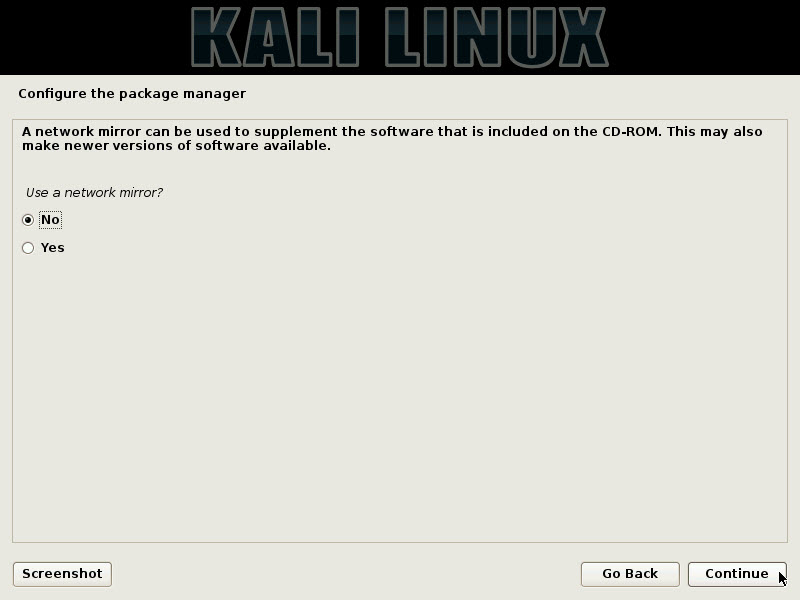
In the Use a network mirror option, select Yes and click continue.If you need to connect to the internet via a proxy enter the proxy information here otherwise leave it blank and click Continue.
Or select No if you don’t need to configure the package manager.
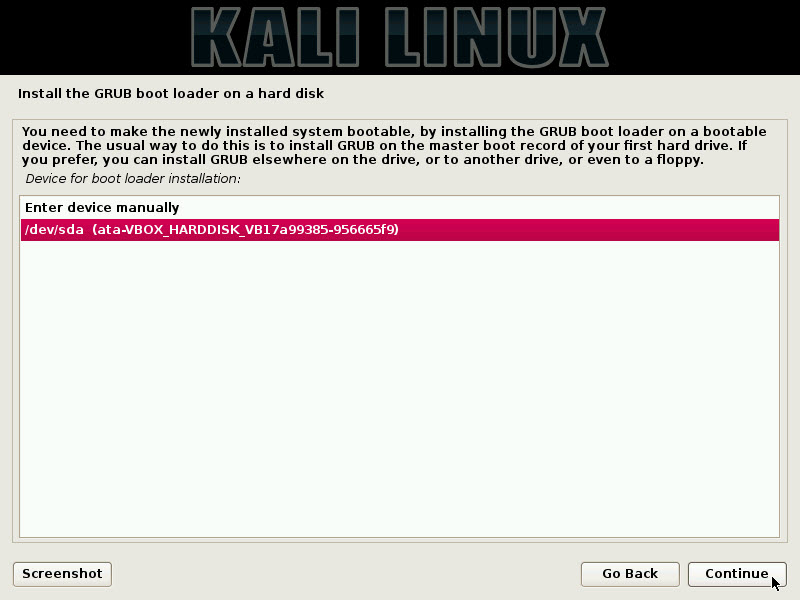
To install the GRUP boot loader on the hard disk, click the YES option and click continue.
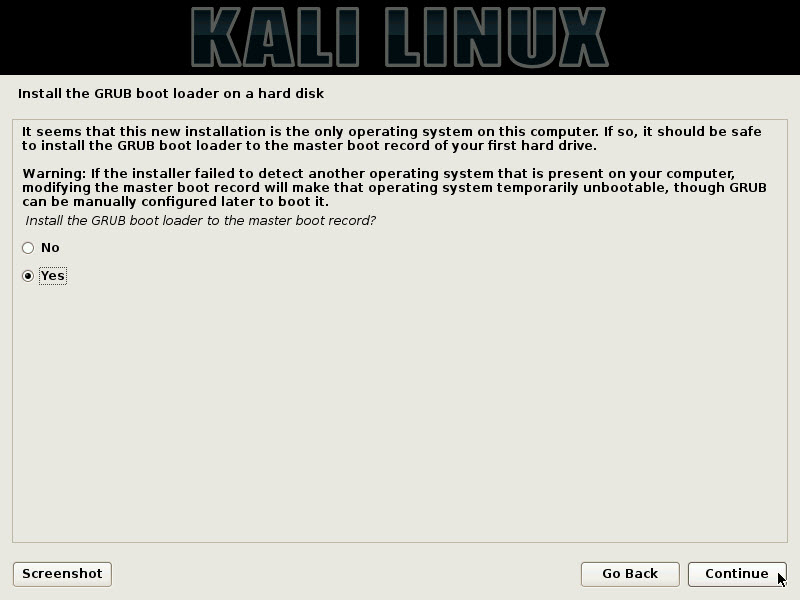
When you clicked Yes, a new window will be shown to you and choose the second option and click the continue.
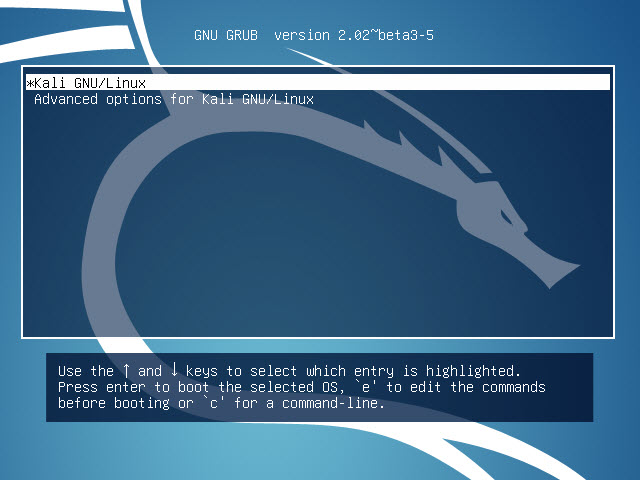
After this, your virtual machine will restart and select the Kali GNU/Linux option in the boot menu.
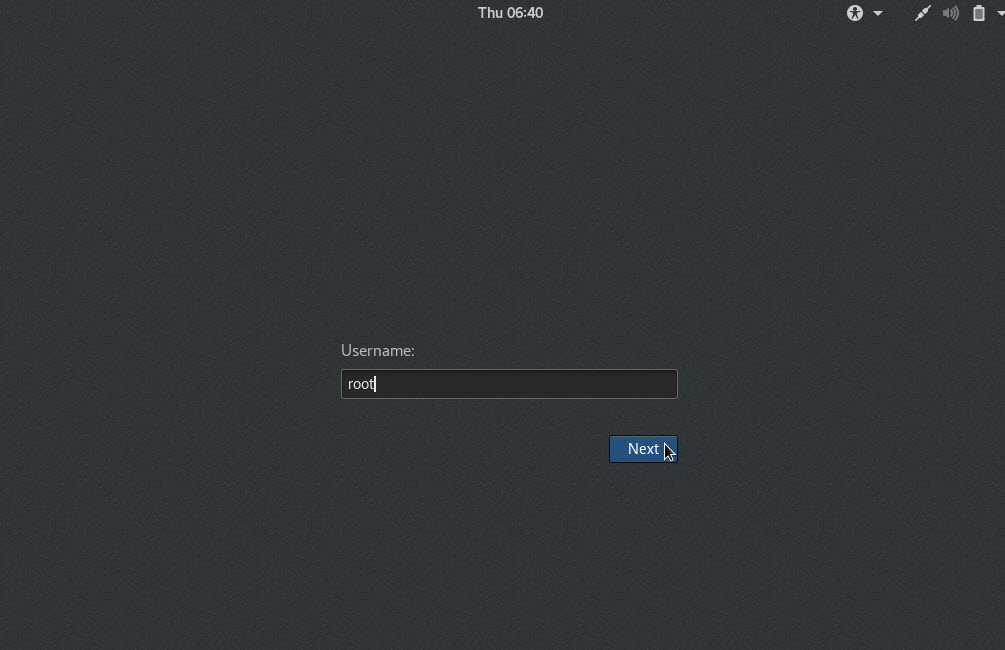
Then you’ll be asked to enter the username and password. The default username is root and the password is whatever you’ve entered in the installation step.


Thanx for such in-depth article…
Helped alot.
Keep sharing such articles
Great, thanks for this tutorial!
holy I am so great full and I can’t just leave only having what I need but I feel moral obligation to thanks for the bloggers and to be with them at any time any update because I have no ideas to get my finding comes true I have seen a lots of sites it couldn’t give me the rational one except wasting my time my effort and motivation that I have . again thanks for everything
Iam getting guru mediation error, Kindly share me the solution for this.
After creating partition for the kale Linux it starts installing and midway it stops and says step failed: installing the system and tells to redo the step but it doesn’t work. Any solution?
Download a new copy of kali linux and try again
Its because you didn’t allocate enough HDD space.
Enable Virtualization in the Setup or BIOS Menu. It may be hard to find because it is different for every hardware and software system.
For me it took forever to find but it was under Advanced Cpu Options – Enable Svm or something like that.
After selecting Graphical Install , Only a blank screen appers no more than that?
Any solution? And also In the on the system tab on left side the acceleration tab cannot be opened?
first check your kali version… is it 32 bit or 64 bit . as your computer bits download the kali version and try to install it again as the same process as shown upper. thankyou.
Same here. I’m using a 32-bit version
Hi, is LINKSYS WUSB6300 AC1200 WIRELESS-AC USB ADAPTER compatible with Virtualbox Kali?
Received an error message:
“This kernel requires an x86-64 CPU, but only detected an i686 CPU.
Unable to boot – please use a kernel appropriate for your CPU”
any solution?
If you are using 64-bit guests, you need to enable hardware virtualization in the BIOS on your host system.
Boot to your bios settings and find the virtualization or virtualization technology or hardware virtualization or VT-x or AMD-V option and Enable it.
Just enable Virtualization in the Setup or BIOS Menu on your device.
after selecting Graphical installation, i received an error message:
“This kernel requires an x86-64 CPU, but only detected an i686 CPU.
Unable to boot – please use a kernel appropriate for your CPU”
Any solution?
i got an error message after selecting the graphic install:
“This Kernel reuqires an x86-64 CPU, but only detected an i686 cPU.
Unable to boot – please use a kernel appropraite for your CPU”
any solution?
2
down vote
Well, the answer is in the error message.
You are trying to install an X86 (64bit) version on to a 32bit system. You need to use the kali-linux-2016.2-i386.iso installer.
Your link for Virtualbox 5.1.14. Download VirtualBox from here is not correct…
https://connectwww.com/peek-record-screen-in-animated-gif/5155/
Added. thanks jonathan. https://www.virtualbox.org/wiki/Downloads
No wifi adapter is showing in kali while I have intel Wireless internally ?