Elasticsearch is a free distributed, RESTful search and analytics engine. It comes with fast search and powerful analytics. It is based on Apache Lucene Library. In this tutorial, you will learn how to install Elasticsearch on Ubuntu system.
1. Install Java on Ubuntu
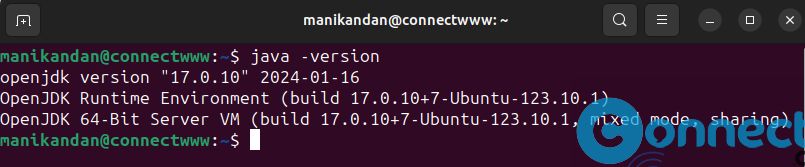
To install and run latest Elasticsearch on your Ubuntu system, you need latest Java JDK release. Elasticsearch includes a bundled version of OpenJDK from the JDK maintainers. But you can also install it. First confirm whether Java is already installed in your system by running below command in your terminal command-line application (ctrl+alt+t)
java -version
If you don’t have java then install it via below commands.
sudo apt install default-jdk -y
2. Install Elasticsearch on Ubuntu
Open the terminal application and run below command to download and install the public signing key.
wget -qO - https://artifacts.elastic.co/GPG-KEY-elasticsearch | sudo gpg --dearmor -o /usr/share/keyrings/elasticsearch-keyring.gpg
You can also need to install the apt-transport-https package. Install it using below command.
sudo apt install apt-transport-https
Now Save the repository definition using below command.
echo "deb [signed-by=/usr/share/keyrings/elasticsearch-keyring.gpg] https://artifacts.elastic.co/packages/8.x/apt stable main" | sudo tee /etc/apt/sources.list.d/elastic-8.x.list
Finally install Elasticsearch using below command.
sudo apt update && sudo apt install elasticsearch
3. Configure Elasticsearch on Ubuntu
Now open the Elasticsearch’s main configuration file using below command.
sudo nano /etc/elasticsearch/elasticsearch.yml
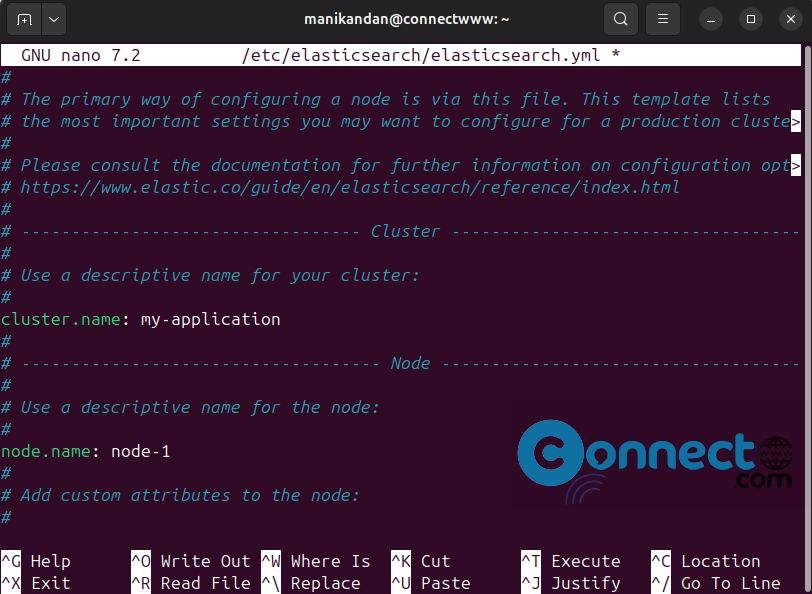
Now you need to specify a cluster name.
Note: Node can only join a cluster if it bears the same cluster name as other nodes in the same cluster.
Now scroll the Cluster section and uncomment the cluster.name directive and give a descriptive name for your cluster.
Next, configure the node name like above steps.
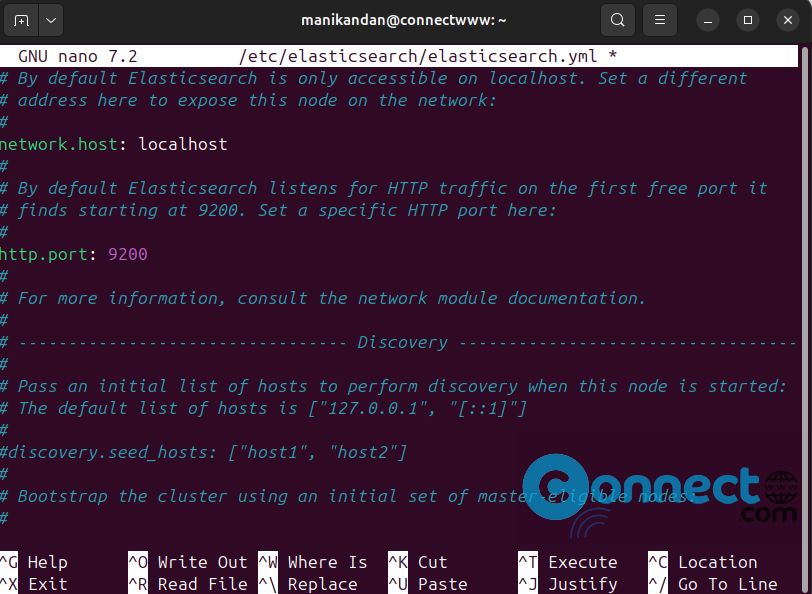
By default, Elasticsearch listens to traffic from localhost or IP address 127.0.0.1 and port 9200. To query another server, set the network.host directive to the corresponding IP address.
Now press Ctrl + X on your keyboard. Now enter Y and hit the enter key.Again hit the Enter key. This will Save and close the file.
Now run below command.
sudo systemctl daemon-reload
And enable the Elasticsearch service to start on startup using below command.
sudo systemctl enable elasticsearch
And start the service using below command.
sudo systemctl start elasticsearch
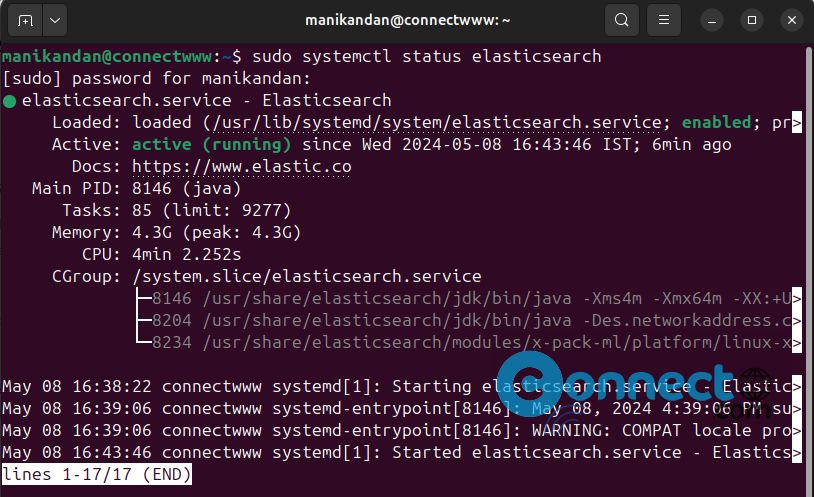
To confirm that Elasticsearch is running, execute the command.
sudo systemctl status elasticsearch
Now run the below command to open the port “9200” for elasticsearch.
sudo ufw allow 9200