In Ubuntu without any 3rd party tools you can take picture of your screen perfectly. In this article you will see the available screenshot methods in Ubuntu.
How to take Screenshot in Ubuntu
Print screen
Just Press the Prt Scrn button from your keyboard. Some other Print screen button names are Print Scrn, Prt Scn, Prt Scr, Prt Scrn or Print screen. It will capture the entire desktop and save the screenshot in Home->Pictures folder. Some other options are
Press Alt + Prt Scrn to capture the currently active window.
Press Shift + Prt Scrn to capture an area you select.
Take Screenshot app
Go to Show Apps menu from Ubuntu dock open Screenshot from application list.
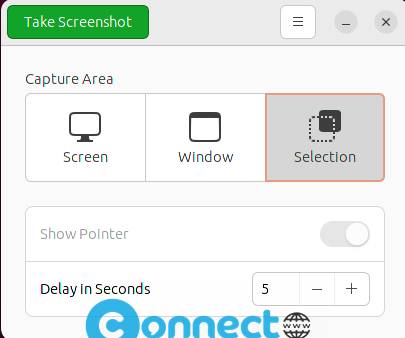
It will open the screenshot tool with GUI. Select the options according to you needs and click the Take Screenshot button to capture your screen.
Screenshot using Terminal
Open your terminal. Press ctrl+alt+t to open it or you can also open it from show applications menu.
Then run below command
import screenshot.jpg
Click and select the area to take the screenshot. Change screenshot.jpg to any file name or any other extension ex ( .png). Open your home directory to see the screenshot file.


Pingback: How to install shutter on ubuntu 11.04 | CONNECTwww.com